Introduction
An offer is either a bundle or single piece of content that your users can purchase. It defines how much a user pays, in which regions this offer is available, what content they get access to in return, and more. Every purchase a user makes — whether a one-time event pass or a recurring subscription — is tied to an offer you have configured. Offers give you full control over your pricing strategy. You can create multiple offers for the same content to give users flexibility. For example, a single live event could have a day pass, a monthly subscription, and a yearly subscription — each as a separate offer. users pick the option that suits them, and you maximise your revenue potential.Offer types
Offers can be configured in various ways, with different billing intervals and access periods.- Pay-per-view (TVOD): A one-time purchase that grants access to a specific piece of content or a defined set of content. Ideal for standalone events, premium replays, or tournament passes.
- Subscription (SVOD): A recurring payment that grants ongoing access to a content catalogue. Ideal for season-long or year-round access where fans pay weekly, monthly, or annually.
- Time pass / bundle: A one-time purchase that grants access to a package of content, e.g. a weekend pass to an entire tournament, or season access to a competition.
Subscription billing cycles are managed by a payment service provider like Stripe. Motto lets you connect your offer to a “product” you create with that provider.
Prerequisites
Before you can start monetizing your content with offers, you must first connect a payment provider. Motto currently integrates with Stripe.Get started
You can create offers using the Motto Studio, which is recommended for most users. Alternatively, you can create offers programmatically using the Motto API.Via the Studio (offer manager)
Via the Studio (offer manager)
First, navigate to the Offers section in the Motto Studio.Click on the “New offer” button to get started.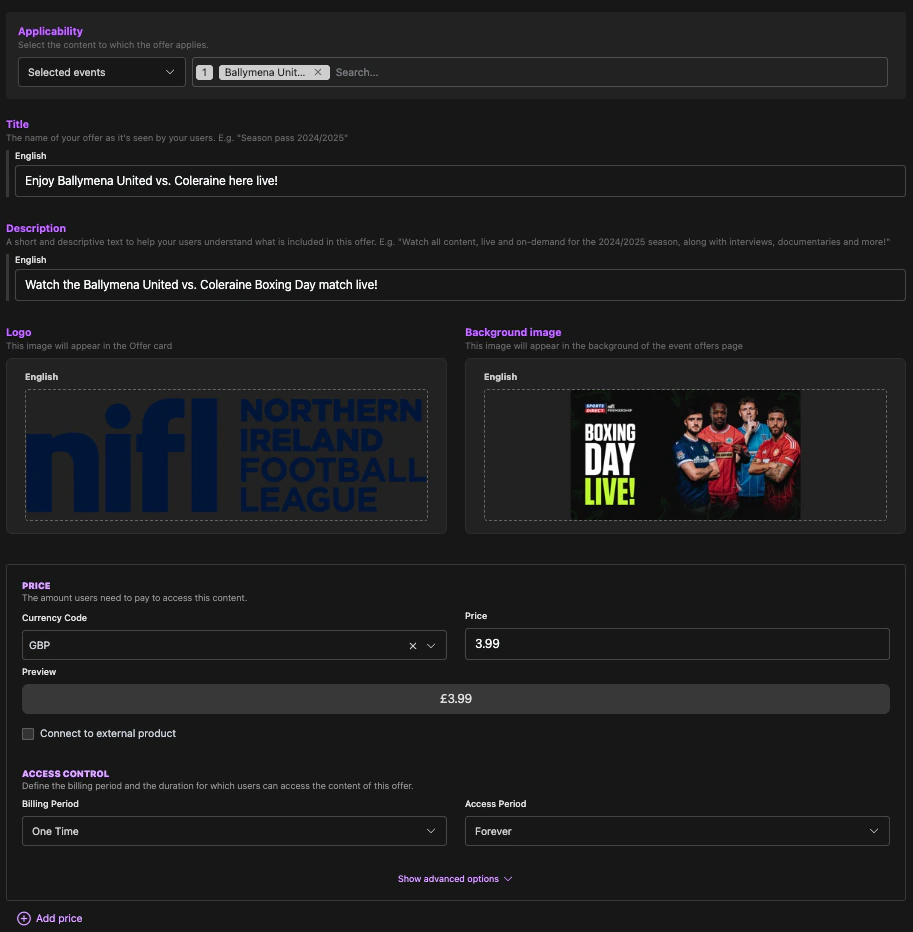
- Connect to external product: check this box if you want to create a subscription. In that case, you must enter the product ID of the payment provider (e.g. Stripe). To learn how to create such products, we refer to the provider documentation.
- Access control - billing period: this defaults to “One time”, meaning the user only pays once (not recurringly). This can only be set to recurring values like “monthly” when you connect this offer to an external product.
- Access control - access period: this defaults to “Forever”, meaning the user’s entitlement to this content will not expire. Other options (e.g. 48 hours) means they will lose their entitlement to this content after that the configured amount of time has passed, counting from the moment of their purchase. This only applies when “billing period” is set to “one-time”; for recurring payments, the access period is controlled by the payment provider.
- Priority: when a user tries to access content on your OTT platform, the available offers are shown to your user in order of priority, where higher priorities are shown first.
- Concurrency limit: this is the amount of devices that are allowed to watch content from the same account simultaneously. For more information, see concurrency control.
Via the Studio (event editor)
Via the Studio (event editor)
When you want to create a PPV offer, i.e. an offer that is for a single piece of content, it is faster to create
an offer while creating the event itself.Follow the normal steps for creating an event. When arriving at the final step, you will be shown the option to
“Add Offer”. When doing so, you will enter a normal offer creation form (as described in the previous section),
with the exception that you do not have to choose which content this applies to, as it is automatically connected
to your event.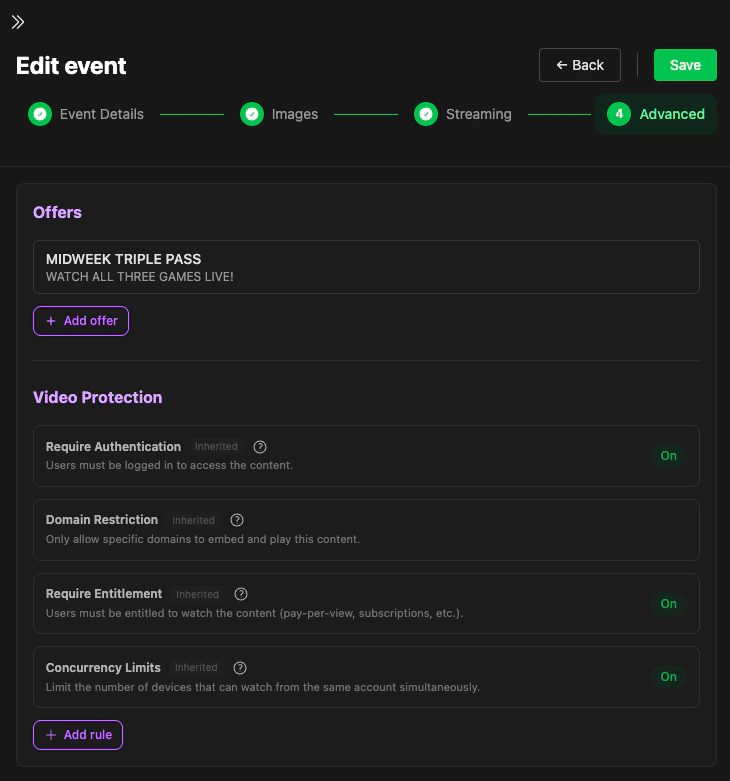
You may already see other offers when creating a new event. This is because you have already created an offer that includes this content via associated metadata (e.g. a competition). Such offers can only be removed from the event by changing the content targeting of that offer.
Via the API
Via the API
See Create Offer.
Next steps
- Stripe integration — connect your Stripe account to process payments
- Transactions — view and understand purchases made by your users